Introduction
Getting started with nominations is often the first step in a variety of award processes, whether it's for faculty departmental awards, staff awards, or student recognition programs. InfoReady is here to make your life easier by automating and streamlining your process, no matter which unit (like the Provost, College, or Foundation) is handling the nominations and awards. With InfoReady, you can effortlessly gather nominations, organize documents, assign reviews and approvals, send out final award decisions, and even do aggregate reporting when you're juggling multiple nominations and awards programs.
Challenges
Usually, nominations involve someone kindly submitting materials or a recommendation for a nominee. Sometimes the nominee needs to be a part of the process, and other times they should not. Nominees are sometimes allowed to nominate themselves as well.Solutions
Integrate the nominee at the point where it makes the most sense for your process and institution. Examples of when you might include the nominee include:- Upon initial submission
- During the review process, or
- With an award notification at the end
InfoReady has functionality to accommodate your needs at any of these stages of the process.
Tips for Creating Your Application
- The Details page allows you to both
- Choose the maximum number of nominations an individual can make and
- Identify the maximum number of awardees
- The default number for both options is 1. If you need to increase the maximum for either, there are options to set a specific maximum number or even choose unlimited.
- The default button label for beginning an application is "Apply". Keeping that terminology for a nomination form would likely confuse nominators. Changing the label is easy to do on the Details page and we recommend using "Nominate" as the label instead.
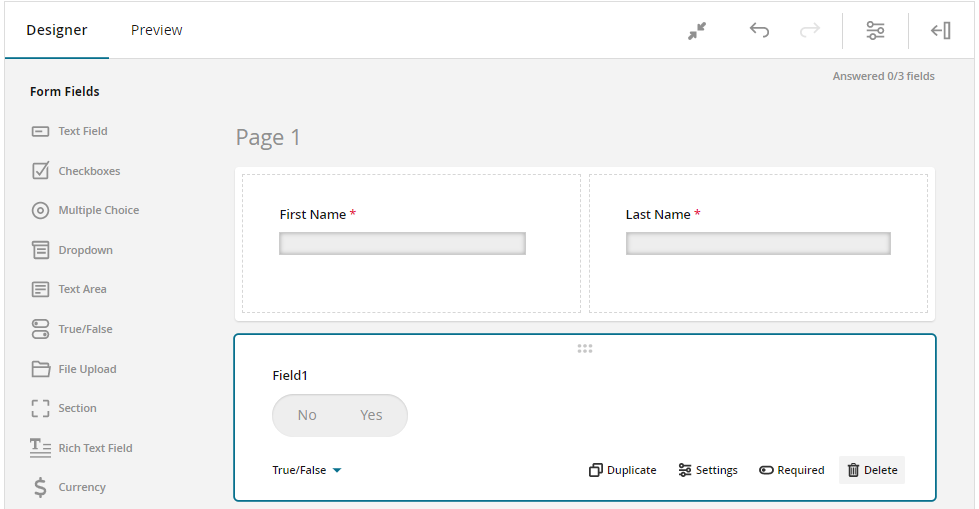
- First Name and Last Name will be required fields. Collecting the nominator info here usually makes the most sense because these fields auto-populate with the first and last name of the person submitting the form. We suggest editing these question labels to be "Nominator First Name" and "Nominator Last Name".
- If you add the Primary Organization field to the application form, this will also be pre-populated with the organization of the person submitting the form, so you may want to add an additional text field to collect the nominee's organization/unit/department.
- If you don't use the Title field to collect the name(s) of the nominee(s), then consider adding separate text fields to collect the nominee's first and last name and any other relevant information and making these fields required.
- Notes to Applicant: Use these to provide additional instructions, which show up as pop-up tooltips when the nominator (applicant) clicks on a field that has instructions enabled. If you add the instructions after creating the field, then you can add unlimited text there (even though the field looks small).
Reference Letters
Reference Letters (if applicable): Customize the instructions and emails to letter writers. Choose how many recommendations are needed and even determine the reference letter deadline. All the applicant will need to do is enter the email address of the people who will be providing letters and then the system will handle communication and collection portion.
Notifications
Notifications: InfoReady allows you to customize email templates in a given opportunity to help personalize communication. Because mail merge tags are used in several email templates, you should make sure the placement of the {applicantName} and {application title} tags make sense in the messages. If not, then we suggest rephrasing the message or removing these mail merge tags from the email templates to avoid potential confusion. The most common email templates you may want to edit are:
- Your Application Received (Recipient: Applicant/Submitter)
- Award Application (Applicant)
- Reject Application (Applicant)
- Review Request (Reviewer)
- Multiple Review Request (Reviewer)
Integrating the nominee into the process
Nominees can be brought in at various points in the process. We have identified the 3 most common points and shared a few tips for each below.
- Upon initial submission - Make sure nominees are copied in the "Add Other Email Addresses for Notifications" section. Any email address added in this section will result in these emails receiving a notification anytime an application update is sent.
- During the review process - Have nominees verify the nomination with Applicant-Driven Steps, or assign them as a "reviewer" to a specific routing step so they can add in more details not provided by the nominator. You might choose to make the routing step A) an approval form or B) even create a form with multiple questions the nominee must fill out.
- Award notification - Include them in the email as the final step, either as a CC or BCC. The Award page has options to enter any award amount, project dates, account numbers; upload a document; and include reviewer feedback to the nominator and nominee.


